
We’re still in the middle of house renovations and while it has been stressful at times, it has also had some positive aspects besides fixing the house. It really jump started our journey on minimizing what we owned and has helped us accomplish a few tasks we’ve been putting off for a while. One of those projects has been on the top of our DiY list of needing to be done. A dining room table.
I adore the farmhouse style and love the rustic look of the farmhouse tables so I knew I wanted a farmhouse table. The key for us was to find a simple, easy, DiY farmhouse table, spending as little as possible. Time has always been short and while my husband can and has done some wood working projects, it’s not his forte and we didn’t want the table to take days on end to build.
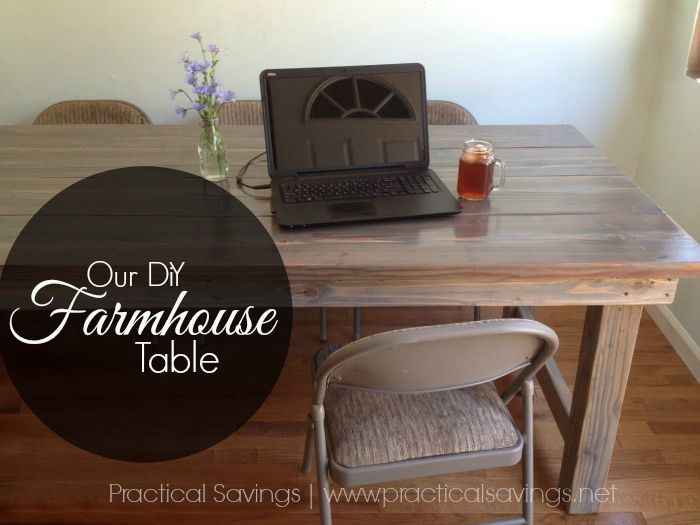
DiY Farmhouse Table
We started working on our floors back in March and had to take all the furniture outside. Our current (at the time) table was considerably dated and I just didn’t want to bring it back in after having new hardwood flooring put it. I mentioned one day to my husband that it would be nice not to bring our table back in and that maybe, just maybe we could finally carve out some time to make a sturdy, simple farmhouse table. He agreed and my excitement bubbled over.
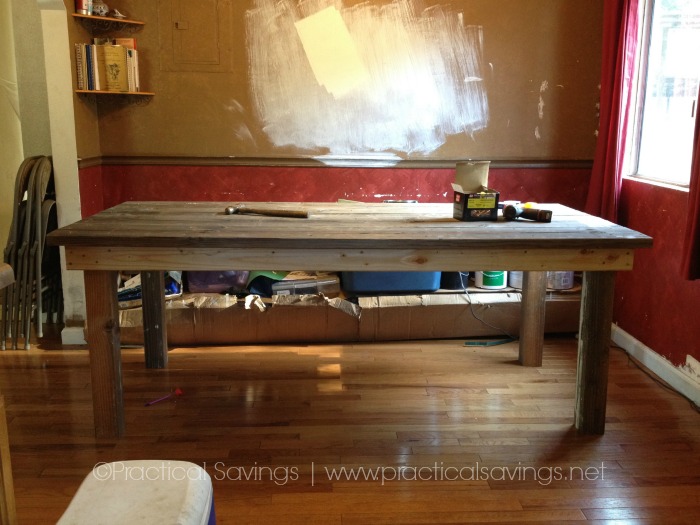
If you follow me on Pinterest, you may have noticed I started pinning farmhouse tables to my Kitchen Idea board. I realized one day that we already had the table top boards. They were leaning against our fence, waiting to be used for raised beds. However, California is going through a drought and with renovating the house, raised beds and gardening just haven’t been a priority for us this year. So the very weathered boards became the top of our farmhouse table.
When it finally came time to build the table, we did a search on Pinterest. My husband already had an idea of how he wanted to make it, but wanted to find a design similar before moving forward. In the end, we went with one similar to what Melissa from The Happier Homemaker shared on Ana White. We made some alterations which I’ll share below.
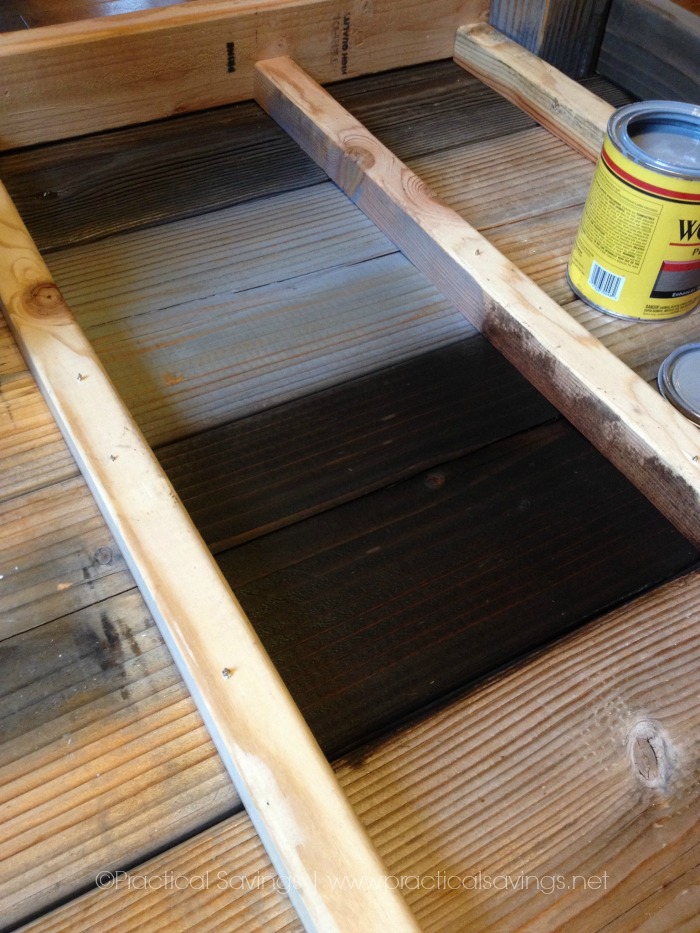
We walked into the home improvement store to look at stain and pick up the few remaining pieces of lumber and screws we’d need. The stain was not an easy decision and I walked away feeling only partially happy with the choice we made. I loved the color but I wasn’t sure it was the right choice for our small dining area.
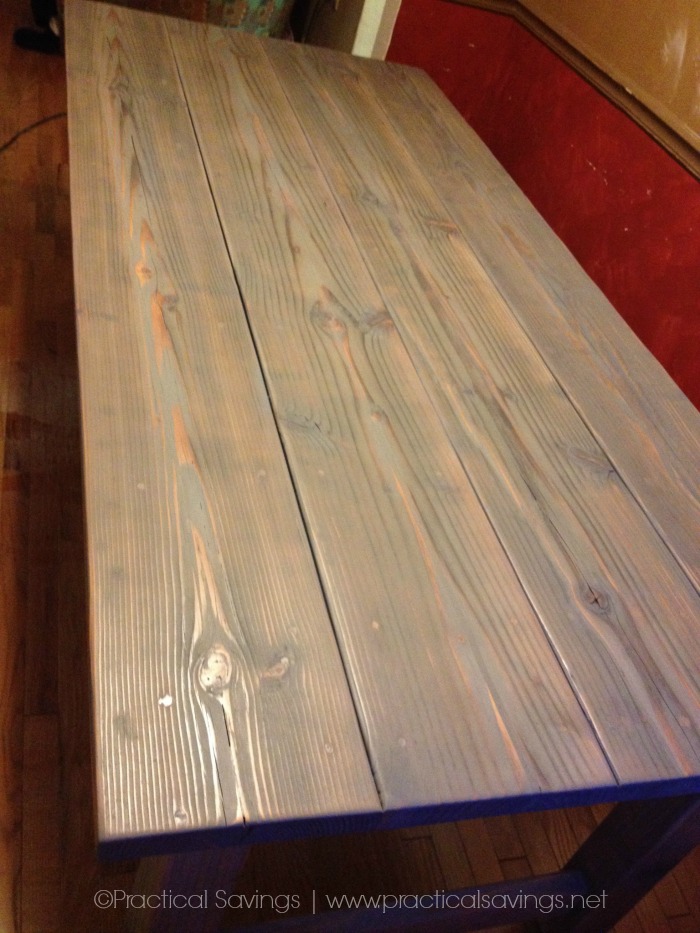
As the unfinished built table sat in my dining area, I realized loved the weathered look and wanted to stick with a similar stain instead of going with the dark walnut we had chosen. In the end, the MinWax Classic Gray won out.
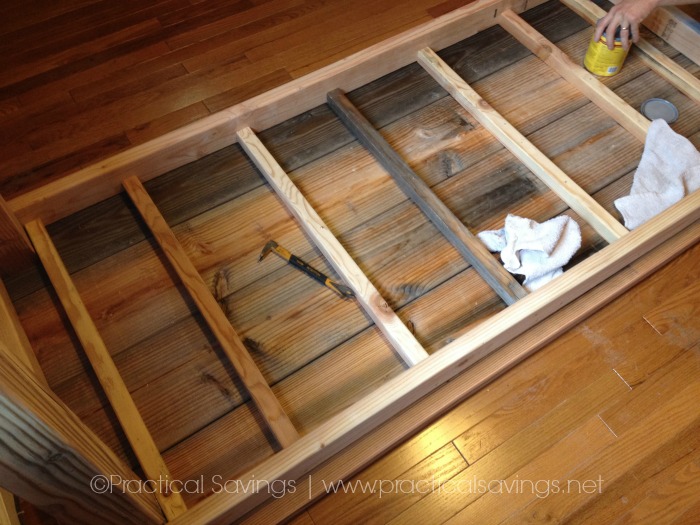
Since our table top boards were naturally very weathered, my husband had to sand them down considerably. Our boards were also badly cracked from the outside elements. Prior to sanding and staining, we filled the cracks in with Elmer’s Wood Filler and the screw holes with MinWax Wood Putty. Hind sight, we would have filled the screw holes in with the wood filler instead of the putty as the wood filler absorbed the stain better. We also filled the cracks between the boards so food doesn’t get stuck between them.

After the stain dried, my husband began applying the polycrylic. He ended up applying the recommended 3 coats to all areas of the table with the exception of the underneath part.
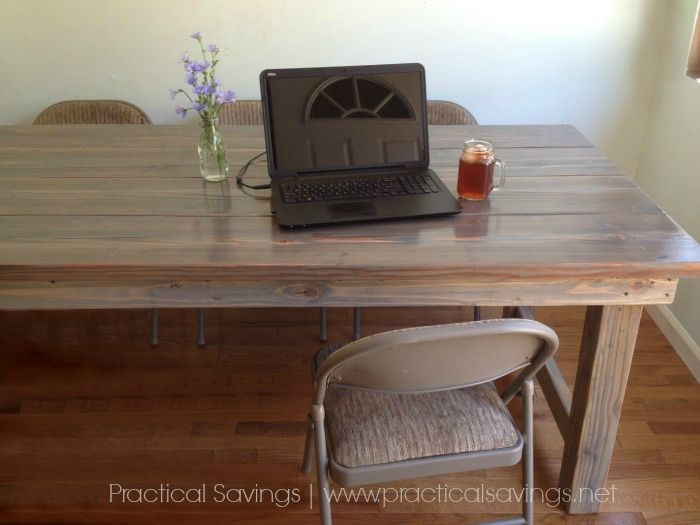
I could not be happier with our table. It fits our family of 7 easily, it’s light enough in color that it doesn’t darken our dining area and it’s so sturdy. No more wobbly legs and praying that our table doesn’t fall to pieces every time we use it. We have also since built a bench that is attached to the facing wall, but we are in the middle of fixing and repainting that wall so pictures will have to come at another time.
[Tweet ” Our DiY Farmhouse Table Reveal #frugaldiy #frugalliving #farmhousestyle”]
Supplies Needed:
- 4 – 2×10 @ 8 ft long
- 3 – 2×4 @ 8 ft long
- 1 – 4×4 @ 10 ft long
- 3 – 2×2 @ 8 ft long (if you can find longer than 8ft, you need a total of 18ft)
- 40 grit Sandpaper
- 120 grit Sandpaper
- Box of 2.5″ screws
- Box of 3″ screws
- Stain (we used Minwax Classic Gray)
- Drill
- Saw
Start off by cutting your boards. If you are following our table measurements, you will need the following cuts:
- Table top – 2×10 @ 6 ft 8 in x 4
- Legs – 4×4 @ 28.5 in long x 4
- Underside bracing (long) – 2×4 @ 77 in long x 2
- Underside end bracing (short) – 2×4 @ 30.5 in x 2
- Bottom bracing (legs) – 2×4 @ 24 in x 2
- Under bracing (under table top boards) – 2×2 @ 30.5 in x 7
For complete instructions on assembling your table, please visit Melissa’s post on Ana White.
We sanded the table down using 40 grit sandpaper until smooth and finished the sanding with 120 grit. The stain we used was one coat of Classic Gray from Minmax and the finish is Minwax Polycrylic, although you could use their Polyurethane.

Leave a Reply